Here's the thing most people don't see coming: the biggest chunk of your loft conversion bill is tied up in stuff you barely notice when it's done. Most of the cash doesn't go into fancy skylights or posh paint. It usually disappears into the messy, structural work that holds it all up and keeps the rain out.
If you think you're just paying for some drywall and a new carpet, brace yourself. Once builders start messing with your rafters, adding steel beams, or lifting the roof, that's when the numbers skyrocket. And honestly, this isn't just builders being dramatic—making a roof strong enough for people to actually live under takes serious know-how (and a lot of expensive materials).
Not all lofts are born equal, either. Some are a breeze to convert. Others need steel beams craned in and entire sections of the roof rebuilt, just to squeeze out a couple of extra feet of headroom. That's why it's so hard to get a straight answer about total cost until someone actually checks out your house.
- Where Most of Your Money Goes
- How Structural Changes Add Up Fast
- Roof Work: The Real Price Driver
- Hidden Costs Nobody Warns You About
- Tips for Saving Money on Your Loft Conversion
Where Most of Your Money Goes
The truth is, the priciest part in any loft conversion cost isn't the finishes you see every day. It's all the hidden stuff—steelwork, reinforcement, and fixing the roof structure so it’s actually safe and usable.
Here’s how the money usually gets split up:
- Structural Work: Most of your budget gets eaten up here. This covers fitting steel beams for support, tweaking joists, and strengthening floors. If your loft wasn’t built for people to walk around, these changes are non-negotiable. A typical job can swallow up to 40-50% of your total cost, just on structural basics.
- Roof Adjustments: If you’re getting a dormer window or raising the ridge, this bit racks up quickly. Making the roof weather-proof again takes serious skill—think tiles, insulation, new waterproofing, and all the finishing touches to stop leaks.
- Stairs: It sounds simple, but putting in a staircase that’s up to building regs and fits well can soak up a big chunk, especially if you need to rejig the layout below.
- Professional Fees: Architects, surveyors, and council permits aren’t the headline, but they add up fast. You’re looking at legal paperwork, plans, and inspections—stuff that feels boring but is definitely essential.
Many people expect to spend the most on fancy bathroom fittings or new windows, but those are rarely the main cost. The real wallet-burners are the things you barely spot but can’t avoid if you want the place to pass building regulations and be safe for your family. Before setting your heart on a dream design, it’s smart to ask builders exactly what’s hiding in the foundation, under the roof, and behind the plaster.
How Structural Changes Add Up Fast
People are always surprised by how quickly costs pile on once builders start talking about “structural work.” Most lofts weren't designed to be lived in, so you can't just slap in a staircase and some insulation. The real expenses hit when you reinforce—or even replace—bits of the house to take the extra weight.
The pricier loft conversion cost jobs nearly always have one thing in common: a need for extra strength in the floor and roof. Older homes especially need new joists fitted, because the originals were only meant to hold up a few boxes, not a bedroom or office. These new joists usually mean lifting up all the old floorboards, threading long pieces of timber through tight spaces, and sometimes chopping out and reframing parts of the ceiling below.
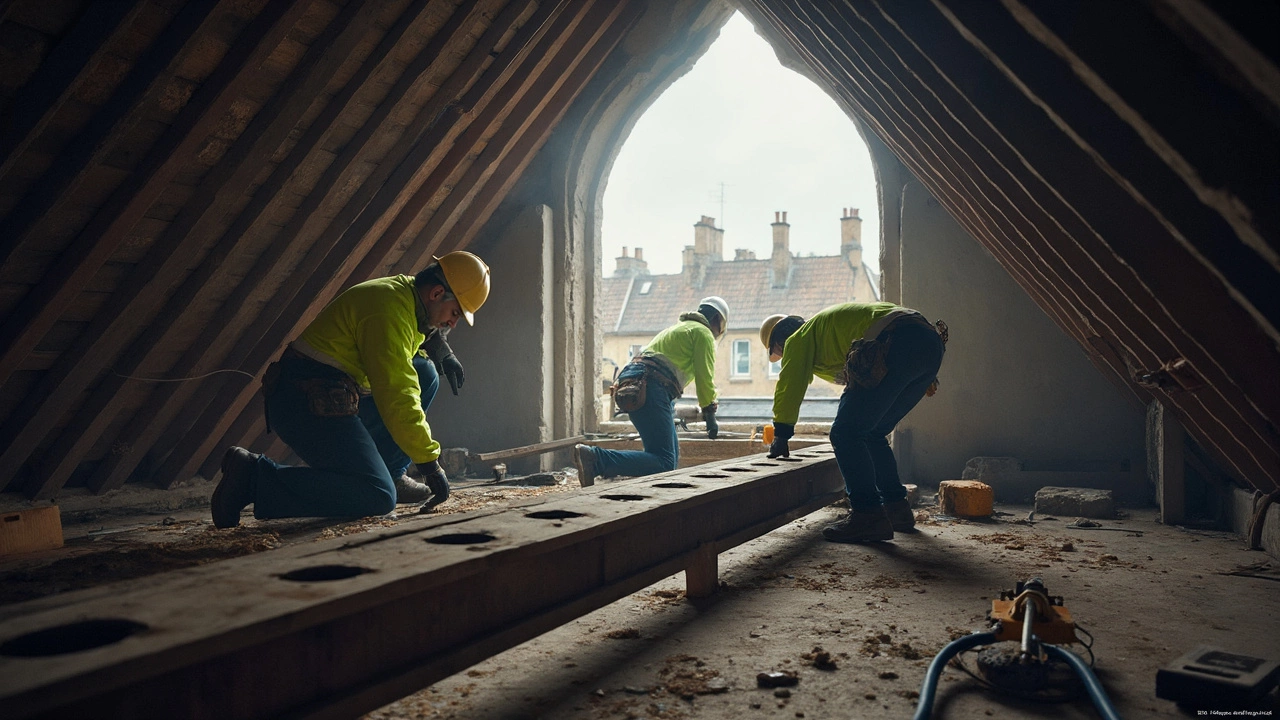
Next up, steel beams. If your existing roof isn’t the right shape or isn’t strong enough, it usually means dropping in steel supports called RSJs (rolled steel joists). These beams have to be measured, ordered, and often craned into position, then fitted into new pockets in your brickwork—messy, noisy, and not cheap. Expect to spend thousands just on the steels, even before you get to boarding over and making everything pretty again.
- Strengthening the floor and adding new joists can cost anywhere from £2,000–£5,000 depending on the room size.
- Steel beams usually start at £1,500 and sometimes head past £4,000, especially if access is tight.
- Making the new structure work with existing walls and rooflines often means extra engineering fees and local council checks.
If your loft isn’t tall enough, you might have to raise the roof. That’s another level of expense, and usually means a completely new roof structure—something that easily pushes up total spend by £10,000 or more.
At the end of the day, structural changes eat up so much of your budget because they’re not just “nice-to-haves”—they’re what keeps the whole space safe and usable. And if corners get cut here, you’ll pay for it later in leaks or dodgy ceilings. This is the spot in your budget where you can’t really take shortcuts without risking major headaches.
Roof Work: The Real Price Driver
Most homeowners underestimate how brutal the roof costs can be. Thing is, the roof can make or break the whole budget, and for loads of conversions, it becomes the single loft conversion cost culprit that blows the ceiling off your spending plan.
If your loft already has decent head height and a solid frame, you're in luck—costs stay lower. But if you need a dormer added for extra space (and, let's be honest, most people do), or you've got to go for a full-on mansard or hip-to-gable upgrade, that's where things get expensive. We're talking everything from scaffolding to waterproofing, new tiles, and even custom windows.
Here's a simple table that shows how different types of roof work stack up in the UK:
| Roof Work Type | Average Added Cost (GBP) |
|---|---|
| Velux/basic windows only | £2,000 - £5,000 |
| Dormer conversion | £10,000 - £20,000 |
| Hip-to-gable conversion | £20,000 - £30,000 |
| Mansard conversion | £30,000 - £45,000+ |
Why so much? You’re paying for the labor, longer project timelines, building control inspections, plus tricky things like moving chimneys or rewiring electrics when the roof shape changes. And don’t forget—if your house was built before 1960, you might need a full roof replacement just to pass building regulations, especially if the old timbers aren’t up to scratch.
On top of the new roof shape, you often need special insulation to meet strict energy rules (that stuff adds hundreds or even thousands). Ever heard of lead flashing? You’ll pay for that too, as it stops leaks where the new roof bits hit old walls. All these little jobs pile up fast.
So if someone throws you a really low quote for a loft conversion, ask exactly how much roof work is included. Cheap usually means corners cut—like not adding enough insulation or fiddling with the existing roof in ways that cause leaks later. Always ask for a full breakdown of roof-related tasks before you sign anything.
Hidden Costs Nobody Warns You About
So you’ve got a quote for your loft conversion and you think you’re set. But here’s the reality check: the loft conversion cost goes way beyond what’s written on that first builder’s invoice. It’s the sneaky extras that get most people, and they’re all too easy to miss until it’s too late.
For starters, things like moving pipes or wiring rarely pop into mind until you see your hot water tank right where the new stairs are meant to go. Sometimes you’ve got to reposition entire heating systems just to get the layout right, and that can add a couple of grand to your bill—no exaggeration.
Then you’ve got to think about building regulations. Your builder may mention this, but the costs keep piling up: fire doors, smoke alarms, extra insulation, and escape windows. Not optional. Councils sometimes insist you change more than just the loft, like upgrading the whole staircase or upgrading doors on every floor. One survey in 2023 found families spent up to £4,000 more than planned due to these surprise add-ons.
Don’t forget the impact on your electrics. Wiring a new room isn’t just about a couple of plugs and some lights; often you need a new fuse board or an upgrade on your mains if the current setup can’t handle the extra load. This is not the time to cut corners – insurance won’t cover DIY disasters.
There’s also basic living stuff. If your loft is the warmest part of the house in summer, you’ll need decent ventilation and probably an air con unit. Skylight blinds that actually block out sunlight? Hidden expense. What looks minor during planning—like moving a waste pipe, moving the water tank, or extra scaffolding—quickly chips away at your savings.
- Unexpected upgrades to your insulation
- Extra structural work after knocking through
- Replacing roof tiles you didn’t plan on
- Temporary accommodation if things get dusty or noisy (especially with kids like mine, Sawyer would never sleep through it)
- Clearing out rubbish, skip hire, or disposing of asbestos (found in older homes more often than you’d think)
| Hidden Cost | Typical Extra Amount (£) |
|---|---|
| Building Regulation Compliance | 1,500 - 4,000 |
| Moving Water Tank/Pipes | 700 - 2,000 |
| Electrical Upgrades | 600 - 2,500 |
| Scaffolding (Additional) | 400 - 1,200 |
| Waste Disposal/Skip Hire | 300 - 800 |
Tip: Ask your builder point-blank about what’s NOT included in the quote. Read every line of your contract. If something’s labelled as “subject to survey” or “to be confirmed,” that usually means it’ll cost extra. And resist the temptation to DIY these surprises—some jobs just aren’t safe to tackle yourself, no matter how many YouTube tutorials you watch.
Tips for Saving Money on Your Loft Conversion
Trying to keep your loft conversion costs down? There are some solid ways to avoid overspending, even when it comes to big-ticket items. The first step is sticking to the original design. Every change mid-build can lead to delays and extra charges. Get the plans nailed down, then leave them alone unless you absolutely have to change something.
Another smart move is getting at least three quotes from builders who specialize in loft conversions. Prices can swing wildly between companies. Don’t just jump at the cheapest; check their references and see examples of their past work. Sometimes paying a little more upfront saves a pile of headache money later on.
- If your roof shape and structure already allow for some headroom, focus on a simple 'room-in-roof' conversion instead of a pricey mansard or hip-to-gable type. The less structural change, the less you pay—plain and simple.
- Pick standard-size windows and doors instead of custom shapes. Suppliers charge a premium for anything out of the ordinary.
- Skip top-of-the-line finishes at first. You can upgrade paint and flooring later if money gets tight.
- Manage the project yourself if you’re confident—cutting out a main contractor can save you up to 20%, but be honest about your time and stress levels.
- Reuse timber or bricks from your existing loft wherever possible. Materials are a big slice of the budget, and recycling what’s already there can really cut costs.
Keep an eye out for hidden fees, too. Stuff like building control fees, scaffolding, or skip hire are sometimes ‘forgotten’ in early quotes. Insist on a fully itemized quote from your builder.
Here’s a quick look at what usually eats up your budget compared to the things you can save on:
| Item | Typical % of Budget | Chance to Save |
|---|---|---|
| Structural work (steel, joists, roof adjustment) | 35-45% | Low—can't really skip this, but compare builder rates |
| Windows & dormers | 10-15% | Medium—choose standard sizes |
| Stairs | 10-15% | Medium—basic designs are cheaper |
| Plumbing & electrics | 10-15% | Medium—don't move bathrooms unless you must |
| Finishes (decor, flooring) | 10-20% | High—go basic at first |
If you sit down and do the math before splashing cash, it’s way easier to spot the savings. Just remember: the real money goes into the loft conversion cost of structural work. Skimping there can backfire, but everything else is more flexible than most people think.