One thing that rattles nearly every homeowner? Seeing a crack sneak across your basement wall or floor. It’s like your house is whispering, "Hey, are we cool down here?". Foundation cracks might look scary, but not all of them need expensive fixes. The real question boils down to this—can you actually tackle that crack yourself before calling in the cavalry? Roll up your sleeves and let’s break it down.
Understanding Foundation Cracks: Not All Are Created Equal
No two foundation cracks are the same. Some are basically stress lines that show your concrete’s personality, while others can threaten the life of your house. So, before you sprint to the hardware store, you need to decode what you’re dealing with.
Foundations crack for a bunch of reasons. Seasonal temperature swings, soil moisture changes, the settling of new construction, or even tree roots getting too friendly. Hairline cracks—those less than 1/16 inch wide—might not be a big deal. But, once you see a crack that’s wider than a credit card (over 1/4 inch), you should pay serious attention.
There are three basic types of foundation cracks you’ll spot:
- Vertical cracks: These go straight up and down (or at a slight angle) and are the most common. Usually, they don’t spell disaster, especially if they’re thin and not growing over time.
- Horizontal cracks: Now, these are more worrisome. If you spot a crack running horizontally, especially in a basement wall, soil pressure may be starting to push your wall inward. That can be a real issue.
- Diagonal cracks: These usually show up at foundation corners. Sometimes they’re caused by uneven settling, or if your house sits on a slope.
Most hairline vertical cracks can be fixed by a determined DIYer. If you ever spot a crack paired with bulging walls, moisture leaks, sticking doors, or windows that suddenly don’t fit right, those are red flags for a professional to check before you do anything else. And if the crack has rusty stains, that could mean your rebar inside is corroding, which only a pro can tackle.
| Type of Crack | Width | DIY Friendly? | Signs to Call a Pro |
|---|---|---|---|
| Hairline Vertical | < 1/16" | Yes | N/A |
| Wide Vertical | > 1/4" | Maybe | Growing, leaking |
| Horizontal | Any width | No | Bulging, soil pressure |
| Diagonal | Up to 1/8" | Sometimes | Rapid widening, leaks |
Fact: More than 60% of U.S. homes sit on soils that expand and contract, so seeing a crack at some point is basically a rite of passage. If your crack hasn’t changed size in a year, it’s probably not urgent. Mark the ends with a pencil and keep an eye on it.

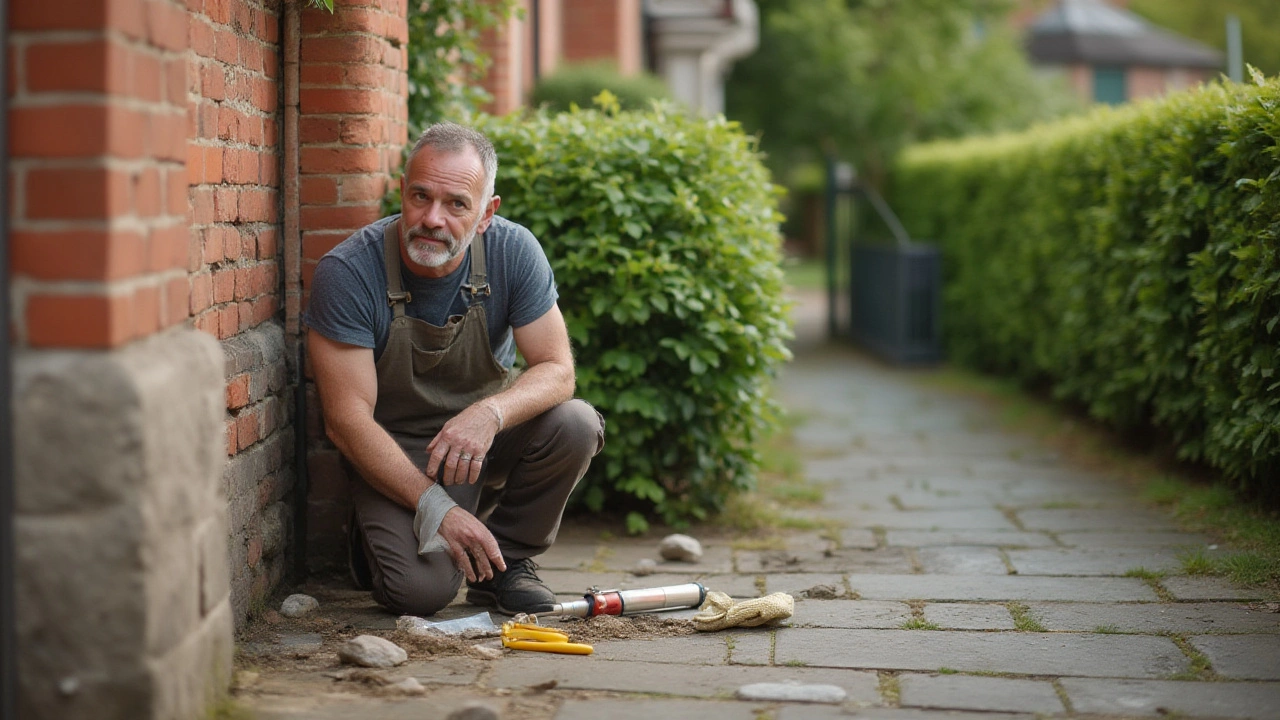
How To Fix a Foundation Crack Yourself: Tools, Tips, and Safety
The good news? Small cracks can be fixed without much drama. You don’t need concrete superpowers—you just need patience and the right game plan. Here’s a step-by-step approach that’ll help you feel like a pro, even without the tool belt.
Gather the right tools first:
- Wire brush and screwdriver (for cleaning the crack)
- Shop vacuum (yep, you want all the dust out)
- Epoxy crack sealer or polyurethane foam kits—grab one rated for structural repair
- Putty knife or trowel
- Safety glasses and gloves (nobody looks cool with concrete dust in their eyes)
- Mixing paddle and bucket (for two-part epoxies)
Ready to fix that crack?
- Prep the crack: Use the wire brush to scrub off any loose concrete on and around the crack. Jam a flat screwdriver into the crevice to widen it slightly, which helps the patch stick better. No shortcuts—good prep leads to a solid fix.
- Clean it up: Vacuum every bit of dust and dirt out of the crack. If the area’s even a little damp, dry it out first (a hair dryer helps!).
- Inject the filler: Squeeze or spread epoxy or urethane into the crack. If you’re using a kit with injection ports, work from the bottom up. Slow and steady wins here—too fast and you’ll trap air bubbles.
- Finish the surface: Smooth the patch with a putty knife so it disappears into the concrete. Some kits include a sandable surface coat for painting or finishing.
- Wait it out: Let it cure for the full time on the label—don’t rush it.
- Paint or seal: If you want to hide it, use a waterproof paint after everything dries.
One handy trick: Stick a strip of clear packing tape over the patch as it cures, to combat any drips or bulges. Peel it off after a few days for a smoother finish. And for basement walls, consider a moisture sealer coat on the whole area—water loves to find new routes inside if it’s determined enough.
Expert tip: Epoxy bonds are actually stronger than concrete itself. When cured, the filled crack is less likely to split again than the surrounding original concrete. But don’t use regular concrete or mortar for crack filling—the shrinkage can make things worse. Go for specialized crack filler every time.
Here’s the kicker—some cracks will keep coming back if you don’t address the real cause. Check your gutters, downslope grading, and outdoor drainage. If rainwater hugs your walls, no amount of fancy filler will help for long.

When to Call In the Pros: The Risks of DIY Foundation Crack Repair
Fixing a small foundation crack feels a lot like winning at homeownership. But when does a simple fix slide into "don’t risk it" territory? Let’s lay out exactly when to stop, drop the caulk gun, and call for backup.
If your crack is wider than 1/4 inch, is leaking every time it rains, or is joined by bowed basement walls or stuck doors, that’s your cue. Some defects can look harmless up front but hide bigger shifts or problems below the surface. A professional might use laser levels, soil probes, or structural scans to see what your eyes can’t.
There’s no shame in bringing in the experts—according to data from the Foundation Repair Association, early intervention saves huge money. Small crack repairs? Usually under $200 for DIY, or $500–$800 if handled by a pro. But if foundation piers or wall anchors are needed, you’re facing $4,000–$15,000 or more. Getting in early is your budget’s best friend.
Homes built before 1970 often used different mixes for concrete and may have thinner foundations. Add in clay-heavy soil, tree roots, or recent droughts, and your risk for big cracks goes way up. If your neighbor’s having foundation work done, you might want to inspect your place too—similar ground, similar ages, same weather patterns.
Sometimes, you’ll hear creaks or even see new cracks appear right after major storms or construction nearby. That’s a good time to keep a close eye on things and document any changes. Pros usually recommend taking a photo every month so you can spot slow growth patterns—super helpful if you need to show a contractor or insurance company down the line.
Let’s bust a myth: most foundation cracks can’t be hidden with paint or spackle. Moisture seepage, even a tiny amount, will bubble up to ruin your paint job, sometimes months later. Using a proper sealer designed for foundations matters—a lot.
And a really interesting fact: modern epoxies used for repairs can set underwater. In emergency repairs (say, your sump pump failed and the basement’s flooded), pro teams use hydrophilic polyurethane injection that reacts with water to form a tight seal. Not a typical DIY, but wild to think about!
Quick tip for the cautious—once a crack is sealed, make a habit of checking for new ones every spring and fall. Seasonal shifts are when cracks most often grow. Set a reminder on your phone, inspect the perimeter, and you’ll usually catch issues fast.
Foundation cracks can feel intimidating, but most aren’t a crisis. If your cracks are hairline, not growing, and not leaking, you really can handle them yourself with a good kit, some prep work, and a bit of patience. Just don’t ignore the warning signs—wide or shifting cracks, water seepage, or anything that looks like a structural issue needs a pro’s eyes. Your home’s bones are worth protecting.